Kitchen Drawer Organization Tips for Chefs
Kitchen Drawer Organization Tips for Chefs
Raise your hand if you’ve ever dug through your kitchen drawer like a treasure hunter searching for a whisk buried under ladles, measuring spoons, and that random cheese grater you haven’t used since 2015. Yep, we’ve all been there. Whether you’re a home cook or a professional chef, kitchen cabinet organization isn’t just nice to have – it’s essential.
Because let’s face it, no one wants to waste precious time untangling spatulas when you’re mid-recipe and your sauce is seconds away from burning. Don’t worry though, I’ve got you covered with some practical tips (and a few tricks I learned the hard way) to whip your kitchen drawers into shape. Let’s get started before your collection of mismatched utensils grows even bigger.
Why Kitchen Drawer Organization Matters
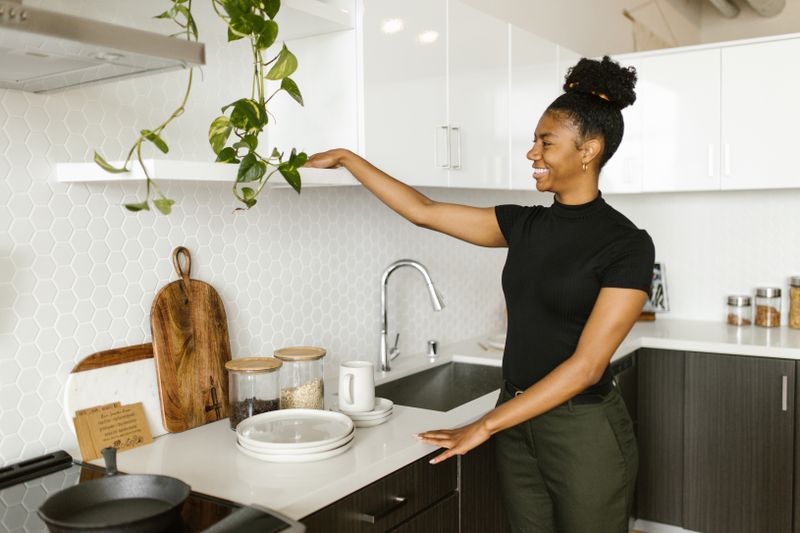
You know that feeling of cooking in a clean, well-organized kitchen? It’s like magic. Everything is within reach, no random spoons are blocking the drawer from closing, and you can actually find the garlic press!
For chefs, whether you’re cooking for yourself or prepping meals for a crowd, time is everything. Having an organized drawer can turn your kitchen into a functional, efficient workspace. If your tools aren’t where they should be, you’ll spend half the time frustrated and the other half Googling alternatives for the tool you can’t find. Save yourself the headache, and invest in a good system.
Oh, and here’s a bonus: organized kitchen cabinets and drawers can save space. That means fewer tools crammed into the back (aka the “land of forgotten Tupperware lids”).
Tip #1: Pull Everything Out
Okay, this is step one – and yes, it’s mildly chaotic. Take everything out of your kitchen drawers. I’m talking utensils, gadgets, rogue rubber bands, and those mysterious packets of soy sauce.
Here’s the deal: you can’t organize what you don’t see. Lay it all out on your counter so you can figure out what you actually use versus what’s just taking up space.
Questions to ask yourself:
- Do I use this tool regularly?
- Is it broken or missing parts?
- Do I have duplicates? (Do you really need three potato peelers?)
Personally, when I did this, I found more wooden spoons than I care to admit. I kept the best one and donated the rest – it felt oddly freeing.
Tip #2: Sort by Function
Once you’ve purged the drawer clutter, it’s time to sort your tools. Group everything based on purpose. For example:
- Cooking utensils: spatulas, spoons, tongs
- Prep gadgets: peelers, box graters, zesters
- Measuring tools: cups, spoons, scales
- Miscellaneous: bottle openers, kitchen scissors, thermometers
Sorting like this makes it way easier to know where things should live. If you’re like me, it also helps you realize you probably don’t need five vegetable corers (unless you’re hosting weekly apple pie competitions).
Tip #3: Invest in Drawer Dividers
Oh, drawer dividers, my not-so-secret weapon. If you don’t already have these little gems, grab some. They basically give your tools designated parking spots.
Here’s where drawer dividers really shine:
- Smaller tools like measuring spoons stay put.
- Dividers prevent that annoying utensil pile-up that blocks the drawer from closing properly.
- Everything looks neat and tidy – because honestly, isn’t that the dream?
Pro tip: Adjustable dividers are life-changing. I tested a few, and they’re perfect for drawers with random size variations. Bonus points if you get ones that are easy to clean, because let’s be honest, you’re going to spill flour in there at some point.
Tip #4: Store the Essentials Up Front
Let’s say you’re mid-cooking. What tools do you grab constantly? Those are the essentials. They need to be front and center in your drawer.
For me, that’s my spatula, tongs, and whisk. These are the VIPs that help me whip up (and occasionally rescue) recipes. Everything else – the garlic press I use twice a month, the fancy meat thermometer – is in the back of the drawer.
Think accessibility here. The fewer obstacles between you and your go-to tools, the better.
Tip #5: Use Vertical Space
Here’s a sneaky trick that will make you feel like you’ve unlocked a secret level of kitchen cabinet organization: use vertical space.
This works best for deep drawers. Instead of letting everything lie flat, try storing certain items upright. Things like:
- Cutting boards
- Baking sheets
- Trays
You can pick up simple organizers designed for vertical storage online, but honestly, I’ve DIY-ed a few with tension rods or repurposed file organizers. They’re cheap and work brilliantly.
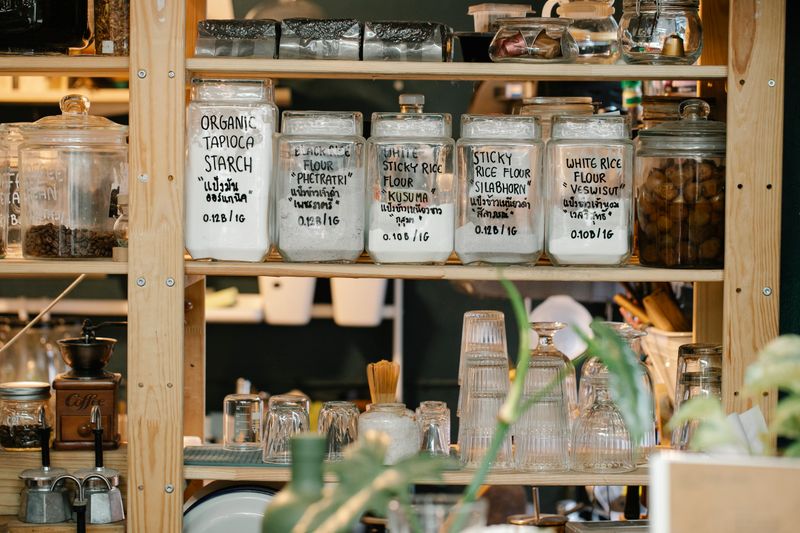
Tip #6: Label, Label, Label
Okay, I love labels. Maybe it’s my inner nerd talking, but labeling everything is a big deal. If you share your kitchen with family or roommates, labels save everyone from asking, “Where does this go?” ten times a day.
You don’t need a label maker (unless you want one – no judgment). Adhesive labels or even washi tape work. Focus on labeling small containers or bins with things like:
- “Baking supplies”
- “Utensils”
- “Misc gadgets”
This was a lifesaver during my last mega drawer cleanout. Now, even when I’m in a rush, I don’t end up throwing stuff into the wrong spot.
Tip #7: Tackle That Junk Drawer
Ah, the infamous junk drawer. Every kitchen has one, and it’s usually a disaster zone. While it’s totally fine to have a place for odds and ends (batteries, tape, random twist ties), you need to reign it in.
Here’s how I tackled mine:
- Grab a small bin or tray for the drawer.
- Sort items into categories – batteries, small tools, coupons, etc.
- Anything random (old receipts, broken pens) goes straight to the trash.
Junk drawers are the wild west of kitchen cabinet organization, but keeping it contained helps your actual cooking drawers stay clean.
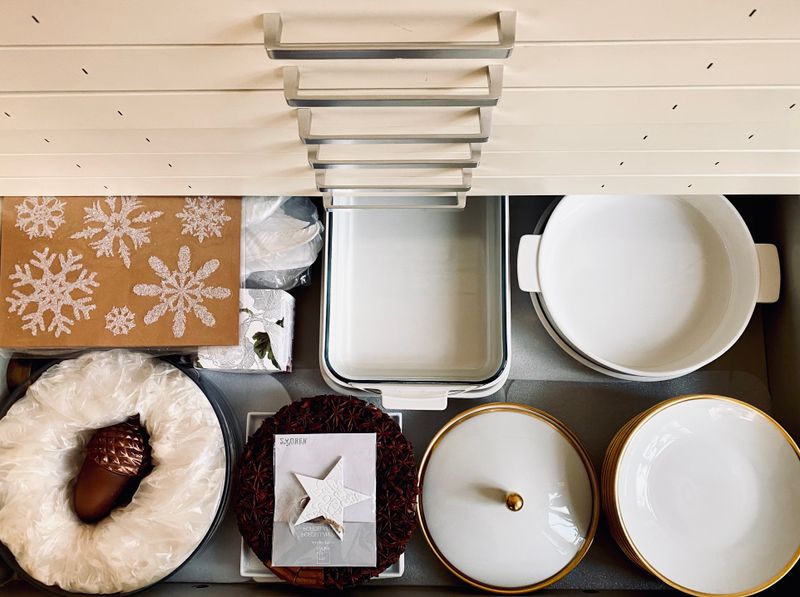
Tip #8: Rotate Seasonally
This might sound weird, but hear me out. If you’re not using certain tools year-round, rotate them seasonally. For example, I swap out cookie cutters and gingerbread molds after the holidays. Same goes for summer-specific items like popsicle molds – they don’t need to live in prime drawer real estate during winter.
This habit keeps your everyday drawers from overflowing, and you’ll feel less overwhelmed every time you open them.
Pro Tips (Because Mistakes Happen)
Even with the best organization efforts, let’s be real – there are common pitfalls. Here’s what I learned:
- Don’t overstuff: The more you cram into a drawer, the harder it’ll be to keep things neat. If you’re out of space, reconsider what you actually need.
- Avoid fancy organizers you won’t use: Some of those Pinterest-worthy setups look gorgeous but are totally impractical. Stick to what works for your lifestyle.
- Check your system monthly: Every so often, things will get messy again. A quick 10-minute tidy-up keeps your drawers functional without a massive overhaul.
Quick Summary
- Pull everything out, purge what you don’t need.
- Sort tools by function – group similar items together.
- Use drawer dividers, labels, and vertical storage to maximize space.
- Keep essential tools front and center for easy access.
- Rotate seasonal items to avoid clutter.
- Revisit your setup monthly to stay organized.
Ready to Get Started?
Organizing your kitchen drawers isn’t rocket science, but it sure feels satisfying when everything’s tidy. Start with one drawer (yes, just one), and work your way around. You’ll be amazed at how much better your kitchen feels – and how much faster you can cook without hunting for your tools.
So, what are you waiting for? Pull out a drawer today and try these tips. And if you’re feeling fancy, snap a photo of your new setup and tag us at [INTERNAL: related topic]. Let’s inspire each other to conquer kitchen cabinet organization once and for all!
Products That Actually Help
Here are a few things I personally use (or have tested) that make a real difference:
- Drawer Dividers – These adjustable drawer dividers keep utensils and tools perfectly separated.
- Lazy Susan Turntable – A turntable makes those deep corner cabinets actually usable.
- Clear Storage Containers – Switching to clear containers changed my pantry game completely.
Note: links above go to Amazon. If you buy something, I may earn a small commission at no extra cost to you. I only recommend products I actually stand behind.