DIY Kitchen Drawer Organizer Projects for Beginners
DIY Kitchen Drawer Organizer Projects for Beginners
Are your kitchen drawers one step away from a disaster zone? You know, the kind where you’re searching for a spatula but end up finding a rogue measuring cup, fifteen mismatched twist ties, and a stray packet of soy sauce? Been there. The good news is, you don’t need a fancy store-bought solution or a professional organizer to fix it. With a little creativity (and some basic tools), you can create kitchen drawer organizer DIY projects that are budget-friendly, beginner-friendly, and honestly kind of fun.
Why Organizing Your Drawers Matters
Messy kitchen drawers aren’t just annoying – they’re kitchen chaos in disguise. Think about it: you’re trying to cook dinner and spend half your time digging around, searching for the one tool you know you have. It’s not just inefficient, it’s stress-inducing.
By putting a DIY spin on organizing, you not only declutter but gain control over your space. Plus, you save money. Sure, you could buy a $40 drawer organizer, but why bother when you can hack one together for 10 bucks?
And honestly, when you finish, you’ll feel like a home improvement champion (cue Rocky theme music). So let’s break this down into simple, actionable projects anyone can tackle. Ready?
1. Cardboard Dividers: The No-Sweat Starter Project
Let’s start small and easy – cardboard dividers. If you’ve got old shipping boxes lying around (Amazon strikes again), you already have the supplies you need.
Steps:
- Measure your drawer size and decide how many sections you want. For example, you might want one for cooking utensils and another for measuring tools.
- Cut cardboard pieces to fit the dimensions of your drawer. Pro tip: Use a ruler to get precise cuts.
- Assemble the dividers by slotting pieces together or taping them in place.
- Arrange them in your drawer and fill each section with its designated items.
Why It Works:
Cardboard is free and easy to work with, so you can experiment without fear of messing up. Plus, it’s sturdy enough to keep everything sorted but simple to replace if needed.
My Take: I did this for my junk drawer first and learned I needed way more tape than expected (rookie mistake). But once I reinforced it, it was surprisingly durable.
2. Wooden Drawer Inserts: Channel Your Inner Carpenter
Feel like getting fancy? A wooden organizer gives you a polished look and can handle heavier items like knives or cooking tools. Don’t worry – it’s not as scary as it sounds.
Steps:
- Head to your local hardware store and buy thin plywood or wooden boards.
- Measure the inside of your drawer and sketch out a plan for different compartments. (Pro tip: Think about the tools you use most often.)
- Cut your boards to size. If you don’t own a saw, ask the folks at your hardware store to cut them for you.
- Assemble the dividers using wood glue or small nails.
- Sand any rough edges so nothing snags on your kitchen gear.
Why It Works:
Wood is sturdy, timeless, and can be customized to your heart’s content. Plus, it’s a major upgrade from cardboard when you want something that lasts longer.
My Take: I tried this for my utensil drawer. Did I measure wrong and end up with a rogue divider? Yep. But after a quick re-cut, it looked amazing and held up beautifully.
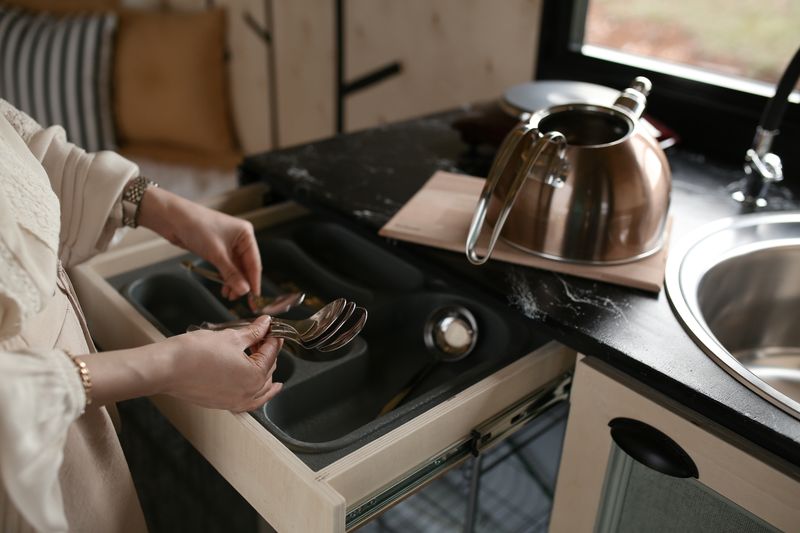
3. PVC Pipe Organizers: Perfect for Small Items
Ever try to grab a whisk or a soup ladle from a crowded drawer, only for the whole thing to tangle like headphone cords? PVC pipe organizers are here to save the day.
Steps:
- Buy a length of PVC pipe and cut it into smaller sections. (Most hardware stores will cut them for you.)
- Sand down the edges so there’s no sharpness.
- Arrange the pipe pieces in your drawer to create compartments. Larger sections for ladles, smaller ones for things like spoons or knives.
- If you’re feeling crafty, paint or wrap the PVC for a cleaner aesthetic.
Why It Works:
PVC pipes are cheap, durable, and surprisingly effective for organizing awkwardly shaped items.
My Take: I tested this for my ladles and spatulas, and it was a lifesaver. Bonus tip: Glue the PVC pieces together if they shift around too much in your drawer.
4. Recycled Plastic Containers: Cheap and Green
Got a stash of old takeout containers or Tupperware you rarely use? Repurpose them into drawer organizers. It’s eco-friendly and ridiculously simple.
Steps:
- Gather containers in different sizes.
- Test-fit them in your drawer to create a layout that feels functional.
- If some containers are too tall, cut them down to size.
- Fill each section with the tools or gadgets they’ll hold – small containers for measuring spoons, bigger ones for spatulas.
Why It Works:
No extra cost, no waste, and a quick win for your drawers. Plus, you can mix and match container styles for a customized look.
My Take: This hack transformed my “everything” drawer into a neat space practically overnight. It’s not fancy, but it’s super effective.
5. Bamboo Skewers as Knife Holders (Yes, Really)
Knives floating around in your drawer = a recipe for disaster. Instead of buying a block or holder, try this clever bamboo skewer trick.
Steps:
- Grab a container that fits snugly in your drawer.
- Fill it completely with bamboo skewers, standing them upright.
- Insert your knives into the skewers – their tension keeps everything in place.
Why It Works:
It’s cheap, simple, and keeps your knives safe and accessible.
My Take: I tested this in a deep drawer, and it’s shockingly effective. Plus, bamboo skewers are inexpensive and easy to replace.
Pro Tips for DIY Success
- Measure twice, cut once: Don’t eyeball it, especially if you’re working with wood or cardboard.
- Test before committing: Always place your dividers or organizers in the drawer before gluing or nailing anything down.
- Label the sections: If your drawer has lots of little gadgets, labeling can save your sanity.
- Keep it lightweight: Don’t over-engineer your dividers – focus on simplicity.
Common Mistakes Beginners Make
- Skipping the measuring step: Trust me, you’ll regret it.
- Overcomplicating the design: Start simple and build up if needed.
- Using flimsy materials: If you’re organizing heavy items, cardboard might not hold up.
- Ignoring aesthetics: Function matters most, but a clean look makes a huge difference.
TL;DR
Organizing your kitchen drawers doesn’t have to be a Herculean task. From cardboard dividers to wooden inserts to PVC pipe hacks, these DIY projects are simple, affordable, and beginner-approved. Start small, measure carefully, and customize your organizers to fit your needs.
Ready to Tackle Your Kitchen Drawers?
No more digging for the cheese grater while your pasta water boils over. Choose one of these kitchen drawer organizer DIY projects, grab your tools, and get started today. Your future self (and your sanity) will thank you.
Products That Actually Help
Here are a few things I personally use (or have tested) that make a real difference:
- Drawer Dividers – These adjustable drawer dividers keep utensils and tools perfectly separated.
- Lazy Susan Turntable – A turntable makes those deep corner cabinets actually usable.
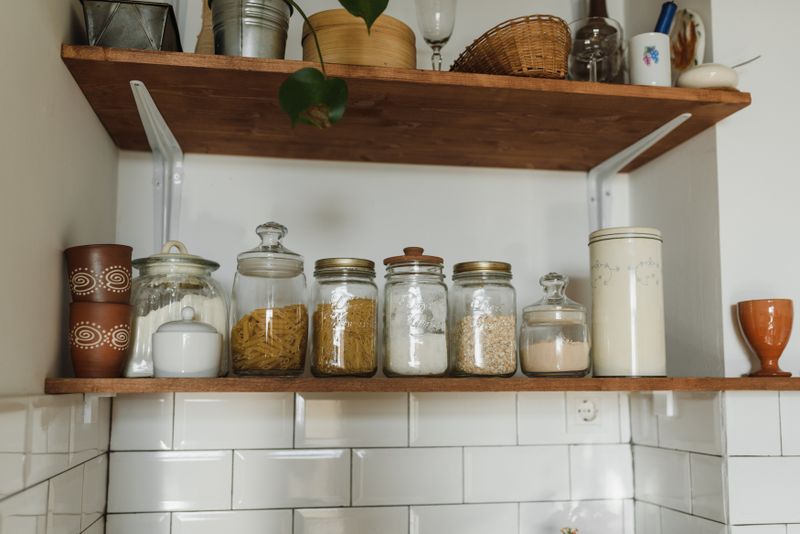
- Clear Storage Containers – Switching to clear containers changed my pantry game completely.
Note: links above go to Amazon. If you buy something, I may earn a small commission at no extra cost to you. I only recommend products I actually stand behind.